Unijoysticle™ 2, 2+, A500, C64, 800XL User Guide

This guide is valid for Unijoysticle 2 models. Features that are only applicable for Unijoysticle 2 / 2+/ 2 A500 / 2 C64 / 2 800XL, are tagged as [v2 only] / [v2+ only] / [A500 only] / [C64 only] / [800XL only] respectively.
What is a Unijoysticle
Unijoysticle is that device that allows you to use modern Bluetooth controllers (gamepads, mice, balance board) in retro computers.
Models
Unijoysticle 2 models:
| 800XL | C64 | A500 | 2+ | 2 | |
|---|---|---|---|---|---|
| Top |  |
 |
 |
 |
 |
| Bottom |  |
 |
 |
 |
 |
| Release date | July 2023 | March 2023 | July 2022 | October 2021 | April 2019 |
| Best for | Atari 800XL / 600XL | C64 / C128 | Amiga | - | - |
| Good for | Atari 400 / Amiga / AtariST | Amiga / AtariST | C64 / AtariST / Atari 8bit | C64 / Amiga / AtariST / Atari 8bit | C64 / Amiga / AtariST / Atari 8bit |
| Status | Active / Supported | Active / Supported | Active / Supported | Discontinued / Supported | Discontinued / Supported |
| Amiga / AtariST mouse support | Yes | No | Yes | Yes | Yes |
| Amiga / AtariST 2nd & 3rd button support | No | No | Yes | Yes | Only in Port 1 |
| Atari 8-bit 2nd & 3rd button support (5) | Yes | No | No | No | No |
| C64 2nd & 3rd button support | No | Yes | No | No | No |
| C64 4th and 5th button support (4) | No | Yes | No | No | No |
| C64 Paddle support | No | Might (1) | No | No | No |
| Rumble (2) | No | Yes | No | No | No |
| Fits | 800XL / 600XL | C64 / C128 | Amiga 500 / 1200 | C64 / C128 | C64 / C128 |
| Buttons | Reset, Mode, Swap | Reset, Mode, Swap | Reset, Mode, Swap | Reset, Mode | Reset, Mode |
| LEDs | Port 1, 2, Bluetooth, Power | Port 1, 2, Bluetooth, Power | Port 1, 2, Bluetooth, Power | Port 1, 2, Power | Port 1, 2, Power |
| Filter noise (Issue #17) | Yes | Yes | Yes | Yes | No |
| Case friendly | Yes | Yes | Yes | Yes | No |
| Easy to solder | No. Most components are SMD | No. Most components are SMD | No. Most components are SMD | No. Most components are SMD | Yes. All components are through-hole |
| Self-powered | Yes | Yes | Yes | Yes | Yes, can be turned on/off with switch |
| External power | USB | USB | USB | USB | Both USB and Barrel Jack 5V+ |
| Total Size (mm) | 65 x 75 x 13.6 | 72 x 68 x 13.6 | 67 x 72 x 13.6 | 64 x 64 x 13.6 | 63 x 66 x 17 |
| PCB Size (mm) | 53 x 72 x 1.6 | 63 x 60 x 1.6 | 52 x 67 x 1.6 | 49 x 62 x 1.6 | 46 x 57 x 1.6 |
| Weight (gr) | 27 | 27.1 | 25.6 | 24 | 37 |
| Current (mA) | ~96 | ~96 | ~96 | ~96 | ~100 |
| USB connector | Micro USB | Micro USB | Micro USB | Micro USB | Micro USB |
Notes:
- (1): Hardware physically connected, but firmware is still WIP.
- (2): Some C64 games can turn on/off rumble on gamepads. See: Rambo, and Lemans (video)
- (3): Right and Middle mouse buttons not supported in C64.
- (4): Based on CrystalCT 5 buttons joystick (video)
- (5): Based on Ascrnet Joy 2B+
Unijoysticle 2 allows you to use modern Bluetooth gamepads. E.g. DualSense controller in retro computers like the Commodore 64, Amiga and AtariST.
It also supports mice (for Amiga / AtariST only).
Quick starting guide
- Plug in the Unijoysticle
- Power on the computer
- Pair your gamepad and/or mouse
Supported computers

The Unijoysticle 2 was designed to fit in the Commodore 64, and Amiga 500 computers. No additional cables are needed for these computers.
However, the Unijoysticle 2 can be used in any computer that is compatible with the Atari DB9 joystick ports.
That includes, but not limited to:
- Commodore 64 / SX-64 / 128 / 128-D.
- Atari 8-bit line, both computers and consoles (requires DB9 extension cable).
- Amiga line (Unijoysticle2 / 2+ requires DB9 extension cable, Unijoysticle 2 A500 fits Ok).
- Atari ST line (requires DB9 extension cable).
- Commodore 16 / 116 / +4 (requires adapter)
- Vampire v4 Stand Alone (tested by the community)
- A2560 Foenix (tested by the community)
- Mega 65 (tested by the community)
- Ultimate 64 Elite MK2 (tested by the community)
Flashing the firmware
See: firmware_setup.md
How to power on the device
There are multiple ways to power on the device
| v2 | v2+ | A500 | C64 | 800XL | |
|---|---|---|---|---|---|
| Self-powered | Yes, requires the "Self powered" switch to be On | Yes, always On | Yes, always On | Yes, always On | Yes, always On |
| USB powered | Yes | Yes | Yes | Yes | Yes |
| External 5V+ | Yes, using the Barrel jack | No | No | No | No |
Note: It is safe to plug the two / three of them at the same time, but that won't give you any additional benefit.
Self-powered
| 800XL | C64 | A500 | 2+ | 2 |
|---|---|---|---|---|
 |
 |
 |
 |
 |
- Gets current directly from the joystick ports. No extra cables needed.
- [v2 only] "Self-powered" switch must be "ON", otherwise the ESP32 won't receive current.
- A beefy power supply with ~4Amps is recommended (depends on the peripherals used).
- Tested successfully with:
- C128 + 1541 Ultimate 2 + Unijoysticle 2 + beefy power supply.
- C64 + 1541 Ultimate 2 + Unijoysticle 2 + beefy power supply.
- SX-64 + Unijoysticle 2
- Atari ST 1040F + Unijoysticle 2
- Amiga 1200 + Unijoysticle 2 A500
- Atari 800XL + Unijoysticle 2 800XL
Note: The Amiga 500 doesn't provide enough current to power the Unijoysticle. You should power the Unijoysticle through the USB port. It is possible to connect the USB port to the Amiga Disk Drive connector (Pin 12 = +5V / Pin 3 = GND, see How to build your own Amiga USB power cable) which provides enough current.
Self-power is available since Unijoysticle 2 Revision D, and is present in all Unijoysticle 2+ / Unijoysticle 2 A500 revisions.
USB-powered
| 800XL | C64 | A500 | 2+ | 2 |
|---|---|---|---|---|
 |
 |
 |
 |
 |
- Use a micro-USB cable to connect the Unijosyticle device to your computer or socket.
- Ideal for debugging: you can see the Unijoysticle console by attaching a terminal to it.
- Needed in the Amiga 500.
- [v2 only]: "Self-powered" switch can either be "On" or "Off".
Jack Barrel-powered [v2 only]

- Connect a 5V+ / ~250mA to the Power Barrel Jack (like some Arduino boards).
- Polarity: positive polarity (tip=+5v, sleeve=0v).
- [v2 only]: "Self-powered" switch can either be "On" or "Off".
Unijoysticle Buttons and LEDs
800XL / C64 / A500 models
| 800XL | C64 | A500 |
|---|---|---|
 |
 |
 |
LEDs:
- Bluetooth LED (Blue)
- On: New connections are accepted. Both "connects" and "re-connects" are accepted.
- Off: No new connections are accepted. Existing connections will stay on.
- J1 LED (Green):
- On: Gamepad or mouse is controlling joystick port 1
- J2 JED (Red):
- On: Gamepad or mouse is controlling joystick port 2
- Power LED (Red):
- On: Unijoysticle has current.
- Off: Disconnected.
Buttons:
- Reset button: Restart the firmware. Connected gamepads/mice will get disconnected.
- Swap button: Swaps connected gampepads / mice.
- For example if a DualSense gamepad is controlling joystick 1 and an Xbox gamepad is controlling joystick 2, "swap" will just swap the gamepads. The result will be that DualSense will control joystick 2 and the Xbox will control joystick 1
- Mode button: Changes the "mode" of the connected gamepad. Modes:
- Basic mode: Connected gamepad controls one joystick
- Mouse mode: Connected gamepad controls one mouse [800XL] / [A500 only]
- Twin Stick mode: Connected gamepad controls two joysticks at the same time
To know in which "mode" it is, the Bluetooth LED (Blue) will blink: * 1 blink: It is in "Basic mode" * 2 blinks: in "mouse mode" * 3 blinks: in "twin stick mode"
See below for further details about gamepad modes.
V2 / V2+ only
| V2 | V2+ |
|---|---|
 |
 |
LEDs:
- J1 LED (Green):
- On: Gamepad or mouse is controlling joystick port 1
- J2 JED (Red):
- On: Gamepad or mouse is controlling joystick port 2
- Power LED (Red in V2 / Blue in V2+):
- On: Unijoysticle has current.
- Off: Disconnected.
Buttons:
- Reset button: Restart the firmware. Connected gamepads/mice will get disconnected.
- Enhanced Mode button: Switches between "Twin Stick mode" and "Basic mode"
- Basic mode: Connected gamepad controls one joystick
- Enhanced mode: Connected gamepad controls two joysticks at the same time
See below for further details about gamepad modes.
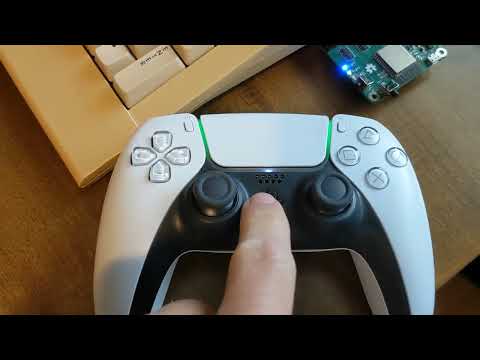
Using Gamepads
The first gamepad to connect will control joystick 2 (Red LED). The second gamepad to connect will use the available joystick.
If you want to control joystick 1 (Green LED), and you only have one gamepad connected, you have to press the "swap" button in the gamepad.

The "swap" button varies from gamepad to gamepad, but usually it is mapped both to:
- the big button in the center (AKA PS, Xbox button)
- and to the "select" (AKA "-", "Share" buttons)
E.g: In the Xbox One it is the "Xbox" button; for PlayStation gamepads, it is the "PS" button.
If two gamepads are connected, then both controllers must press the "swap" button in order to swap joysticks.
The gamepad could be in three possible modes:
- Basic mode: one gamepad controls one joystick.
- Twin Stick mode: one gamepad controls the two joysticks.
- [800XL] / [A500 only]: Mouse mode: one gamepad controls one mouse.
To switch modes you can press:
- the "mode" button in the Unijoysticle device
- or the "Start" (AKA "+", "Options" button) on the gamepad
Basic mode

Basic mode is what you would expect, with the additional benefit that Button B is mapped to "jump". Ideal for platform games like Giana Sisters, Super Mario Bros, Mayhem in Monsterland, etc.
- D-pad/joypad: controls up/down/left/right
- Button A / Cross: fire button
- Button B / Circle: "up" (ideal for platform games)
- Button X / Square: 2nd button (Amiga / Atari ST only)
- Button Y / Triangle: 3nd button (Amiga / Atari ST only)
- Button shoulder-right: autofire
Twin Stick mode (AKA Enhanced mode)

In Twin Stick mode, you control both joysticks from only one gamepad.
Ideal for Twin Stick games like:
And since "Button B" is mapped to "J1 fire" this is great for games that use "space", like:
- Commando to throw grenades
- 1942 to do rolls
- Turbo Outrun to press "turbo"
- and many others
Mappings:
- Left joypad / d-pad: control Joystick 2 movements
- Right joypad: control Joystick 1 movements
- Button A / Cross: fire for Joystick 2
- Button B / Circle: fire for Joystick 1
- Button X / Square: 2nd button for Joystick 2
- Button Y / Triangle: 2nd button for Joystick 1
- Button Shoulder Left: auto-fire for Joystick 2
- Button Shoulder Right: auto-fire for Joystick 1
Mouse mode

[A500 only]
In Mouse mode you control the mouse from a gamepad.
- Left or Right axis control the cursor movement
- Button A / Cross: left button
- Button B / Circle: right button
- Button X / Square: middle button
Note: Mouse emulation only works on Atari 8-bit / Atari ST / Amiga computers.
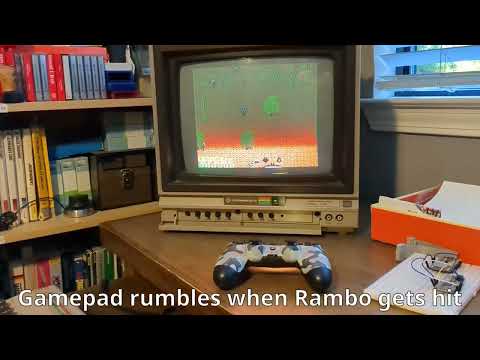
Gamepad buttons [C64 only]
In addition to the regular 3-button mode, Unijoysticle2 C64 supports two special modes:
- "5 buttons mode" that allows to use 5 buttons (instead of the regular 3).
- "rumble mode" that allows the game to send "rumble events" to the gamepad
| 3-button mode (default mode) | 5-button mode | rumble mode |
|---|---|---|
 |
 |
 |
To enable / disable this mode (disabled by default), you have to use the serial console (see below for further instructions). E.g:
bp32> set_c64_pot_mode 5buttons
set_c64_pot_mode:3buttons,5buttonsorrumble3buttons: Default mode. 2nd and 3rd pot buttons are enabled.5buttons: In addition to the 2nd and 3rd buttons, it also enables 4th and 5th buttons. See crystalct/5plusbuttonsJoystick for further info.rumble: Only regular "fire" is enabled. Gamepad can receive "rumble" events from the game by using the POT lines.
For further info about "Rumble" mode please watch:
Supported controllers
Unijoysticle supports most, if not all, modern controllers. This is a non-comprehensive list of all supported controllers.
Supported gamepads

- Sony DualSense
- Sony DUALSHOCK 4
- Sony DUALSHOCK 3
- Sony PS3 Move
- Xbox Wireless (models 1708, 1914)
- Nintendo Switch Pro
- Nintendo Wii U
- Nintendo Wii
- Nintendo Balance Board
- Stadia
- Steam
- Android gamepads
- PC/Window gamepads
- 8BitDo
- iCade
- And more
For a complete list, see:
Supported mice

Mouse emulation is only avaiable for Amiga, Atari ST and Atari 8-bit computers.
For a detailed list of supported mice, see here:
Console
You can configure and dump the current Unijoysticle status from the USB Console.
- Connect the Unijoysticle with the micro-USB cable to your computer
- Launch a terminal
CH340 Driver (Windows only)
The drivers are only needed for Windows. Linux has built-in support for CH340.
After connecting the usb cable to the Unijoysticle and your PC do:
- Open "device manager" and check if a serial port has been added under "ports COM and LPT"
- If not, then download and install CH340 USB to Serial Driver
- If you have trouble installing the drivers, see: SparkFun CH340 Install guide
- Look at which serial port number has been added (COMx where x is a number)
Install a terminal program
- Windows: Putty, Arduino Serial monitor (See "Troubleshooting" for detailed steps), idf.py monitor, etc.
- macOS: tio, minicom, idf.py monitor, etc.
- Linux: tio, minicom, idf.py monitor, etc.
The parameters for the terminal are:
- Choose the correct port:
- Windows: See above
- Linux & macOS:
/dev/ttyUSB0(orttyUSB1...) - Connection speed (bauds): 115200
How to use it

As an example, this is how to connect to the console using tio and minicom
# tio: A great serial terminal  (recommended!)
$ tio /dev/ttyUSB0

# If you can't use tio, minicom works too.
$ minicom -D /dev/ttyUSB0
There are many useful commands. The most "common" ones are:
list_devices: Get information about connected deviceslist_bluetooth_keys: List Bluetooth bond keysdel_bluetooth_keys: Delete stored Bluetooth bond keys. Useful if you are having reconnect issues.incoming_connections_enable <0 | 1>: To enable/disable Bluetooth incoming connections.swap_ports: Swaps joystick portsgamepad_mode <mode>:normal,twinstickormousenormal: One gamepad controls just one joystick.mouse: Gamepad behaves like a mouse. Usefule in Amiga / AtariSTtwinstick: One gamepad controls both joysticks at the same time. Good Twin Stick games like Commando 2084c64_pot_mode:3buttons,5buttonsorrumble3buttons: Default mode. 2nd and 3rd pot buttons are enabled.5buttons: In addition to the 2nd and 3rd buttons, it also enables 4th and 5th buttons. See crystalct/5plusbuttonsJoystick for further info.rumble: Allows games (e.g: Rambo, Lemans) to send "rumble" feedback. 2nd and 3rd buttons are disabled.- Collection of C64 games that are known to work with more than one button, or in rumble mode
mouse_emulation <emulation>:amiga,ataristamiga: Emulates an Amiga mouse (default for A500, v2, v2+)atarist: Emulates an Atari ST mouse (default for 800XL)mouse_scale <value>: Set/get global mouse scale factorautofire_cps <cps>Sets the autofire 'clicks per second' (cps)versionGets the Unijoysticle version infohelp: Print the list of registered commands
Troubleshooting
Fails to boot

Booting the device takes ~1 second. You should see:
- Power LED must be On
- J1 (Green) & J2 (Red) LEDs should stay On for ~1 second
- Once J1 and J2 are Off, the device will be ready to use
If one of the above mentioned conditions are not met, please file a bug (See "Filing bugs" down below).
Gamepad cannot connect
This could be due to a lot of things. Assuming that you are using a supported gamepad, try:
-
Unplug the Unijoysticle from the Commodore (turn off the Commodore first).
-
Reset the Unijoysticle: Press the "Reset" button that is placed in the ESP32 Mini Kit.
-
While rebooting, the LEDs should turn on, and after ~half a second, then they should turn off.
- If the LEDs don't turn On at all: file a bug (see below).
-
If the LEDs don't turn Off, it means that Bluetooth is not ready. Go to step 2.
-
Once the LEDs are off, trying connecting the Gamepad again.
-
If it fails press "Reset + Toggle-Mode" buttons at the same time. This will reboot the Unijoysticle while also deleting the stored Bluetooth keys.
-
Put the gamepad in Bluetooth discovery mode (grab the manual of your gamepad). Try again.
-
If it fails, trying connecting the gamepad to a Linux (MacOs or Windows might be the same) machine first. If the gamepad cannot connect to Linux, then most probably it is a gamepad issue. Cannot help here.
-
Repeat. Go to Step 2.
If it keeps failing, file a bug (see below).
Gamepad cannot re-connect
Assuming that the gamepad connects Ok for the first time, but fails to reconnect then:
-
Press the Reset + Toggle-Mode buttons at the same time. This will reboot the Unijoysticle while also deleting the stored BT keys. Any try again.
-
Put the gamepad in Bluetooth discovery mode. And try again.
If none of the above works, file a bug (see below).
Filing bugs
File bug here: https://github.com/ricardoquesada/unijoysticle2/issues
When you file a bug, make sure that you include as much information as possible:
- Gamepad you are using. If possible the firmware version the gamepad is using.
- Unijoysticle firmware.
- Computer that you are using: C64, C128, etc.
- How you are powering the Unijoysticle.
- Logs (this is the most important thing!)
Unijoysticle logs
The logs can be fetched by connecting a terminal to the ESP32 module.
- Connect the Unijoysticle to the PC using a micro USB cable.
- Launch any serial terminal. Possible options:
- Arduino Serial Terminal (See below for detailed steps)
- or
minicom -D /dev/ttyUSB0(Linux, macOS) - or
tio /dev/ttyUSB0(Linux, macOS) - or
idf.py monitor(Linux, macOS, Windows. requires to checkout Bluepad32 source code) - or putty (Windows only)
- Reset the Unijoysticle
- Try to connect the gamepad again.
- Let it try for a few seconds.
- Copy & paste the output from the terminal and put it in the bug report.
Arduino terminal step-by-step
- Download Arduino from here: https://www.arduino.cc/en/main/software
- Launch Arduino -> Tools -> Set Port

- Arduino -> Tools -> Serial Monitor

- From the Serial Monitor, set Bauds to 115200

Contact
- Email group: https://groups.google.com/forum/#!forum/unijoysticle